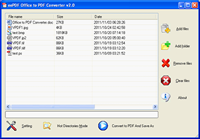
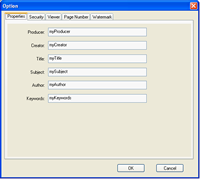
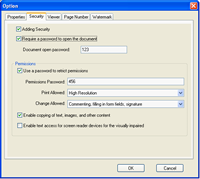
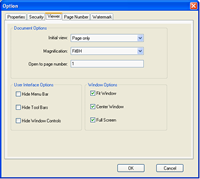
Convert Office document to pdf and set pdf propertyThe main window of program Office to PDF Converter is like that presented in Fig.1. The top left part of the window is a table of a file list which lists the source documents to be converted. On the right side, the button [Add files] is to activate an “Open” dialog for adding source files to convert, [Add folder] button is to open a “Browse for Folder” dialog for adding a directory containing the documents to be converted, the button of [Remove files] is to remove selected files from the file list, and [Clear] button is to remove all files from the file list. Pressing the button of [Setting] in the bottom of the main window will open an “Option” dialog as presented in Fig.2. In the dialog, the tab of “Properties” is for setting the property information of the converted pdf files. You can set the “Producer”, “Creator”, “Title”, “Subject”, “Author” and “Keywords” information in this tab. In the tab of [Security] of dialog “Option” is options of setting the access permissions. In this tab, you can enable or disable the security for your converted pdf files. After checking the box of “Adding Security”, you can set a password to control who can open the pdf document, and you can also set a password to confine the permission of printing and editing. You can also decide whether other reader can copy the contents of your converted pdf documents in this tab. The [Viewer] tab of dialog “Option” is for setting the viewer preferences for your converted pdf files. In this tab, you can decide the “Initial view”, the initial “Magnification” and the firstly displayed page (“Open to page number”) of the viewer opening the converted pdf files. You may as well enable or disable the following options, “Hide Menu Bar”, “Hide Tool Bars”, “Hide Window Controls”, “Fit Window”, “Center Window” and “Full Screen” in the tab. In the other two tabs of “Page Number” and “Watermark” are options for adding page numbers and watermarks to the pages of converted pdf files. |


